This Lightroom tutorial will cover what you need to know to get started with Adobe Lightroom for beginners.
Lightroom Creative Cloud vs. Lightroom Classic
There are two versions of Lightroom: Lightroom Creative Cloud (now just Lightroom) and Lightroom Classic. Lightroom is the cloud-based version across desktop, mobile, and web. Lightroom Classic is the desktop version focused on local storage and has more comprehensive features. Since many of the controls are similar between the two apps, this tutorial will focus on the more feature-heavy Adobe Lightroom Classic. So, let’s dive into how to use Lightroom.
How to Import Photos
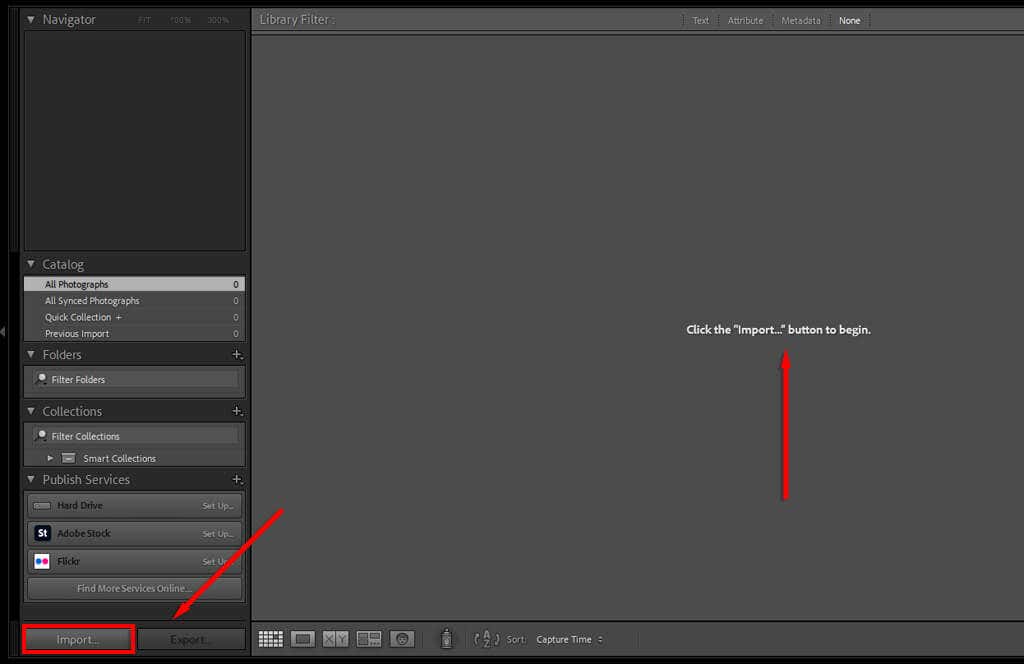
When you first open Lightroom, you’ll be asked to create a Lightroom catalog. Choose a location on your local drive (this will be faster than an external drive). Once this is completed, there are a few ways you can import photos, depending on your workflow: Pro tip: You can import most file types into Lightroom (for example, JPEG, PNG, or RAW). However, if you use a digital camera, we recommend using RAW files, as these preserve the greatest detail and enable you to perform more in-depth edits.
How to Organize and Manage Photos
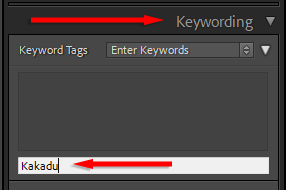
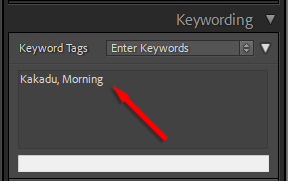
Once you’ve imported your photos, you can begin to organize them. There is no hard and fast rule for photo management, so it depends on your preferences. However, Lightroom allows you to add keywords and other metadata to photos to sort and access them easily. To add keywords to your photos: Lightroom also lets you add and edit photo metadata. In the Metadata drop-down menu, you can add a title, caption, copyright information, a creator’s name, and a rating for the photo. This information is saved in the photo file.
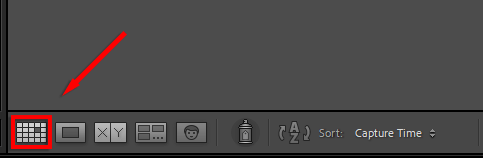
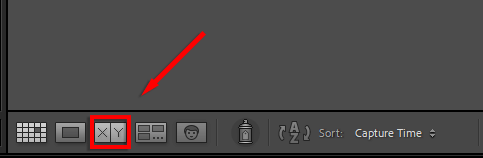
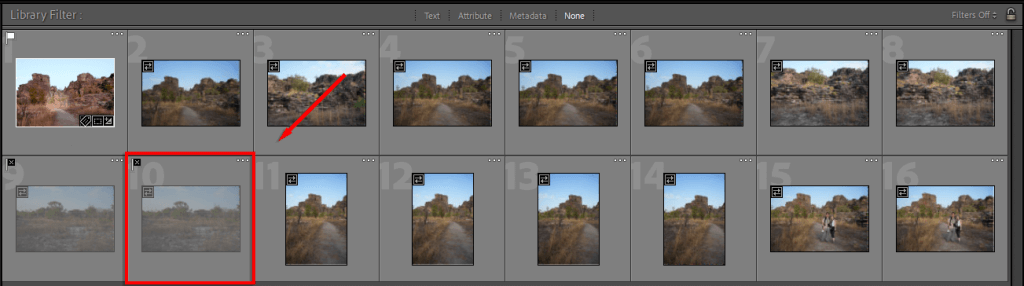
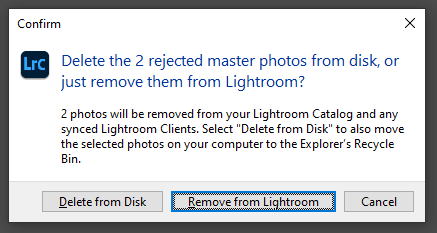
How to Sort and Discard Photos
If you’ve just been on a recent trip, chances are you have thousands of photos and hundreds of near-duplicates. That’s okay — Lightroom has everything you need to sort through and discard the ones you don’t like. Here are a few tips when it comes to “culling” your photographs:
How to Edit Photos
Now that you’ve sorted your photos and decided which ones are keepers, it’s time to turn them into professional-grade images. In this section, we’ll cover the major editing tools in the order they appear in the Develop tab.
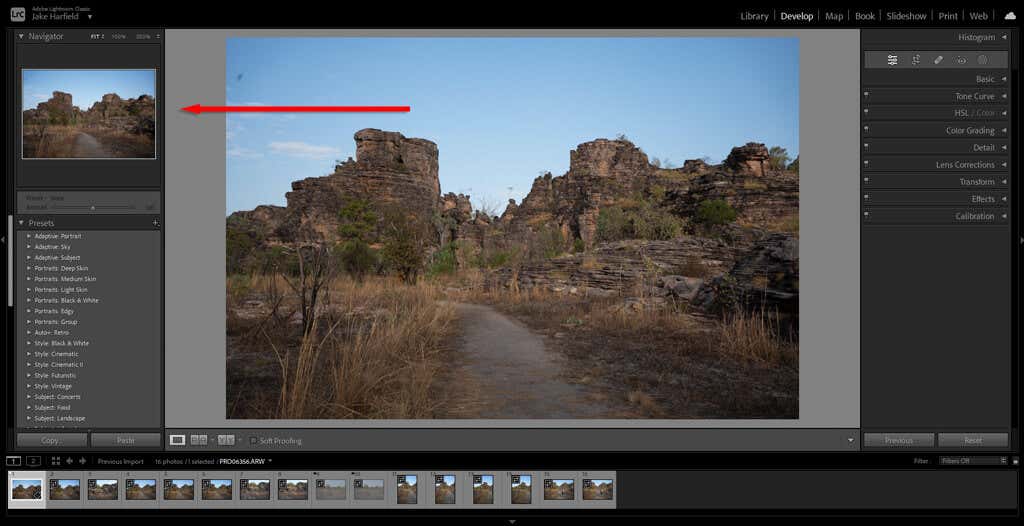
An Introduction to the Develop Module
Lightroom provides a fairly large suite of image-developing tools, and if you’ve never used it before, you might be wondering what you’re looking at. Here’s a quick breakdown:
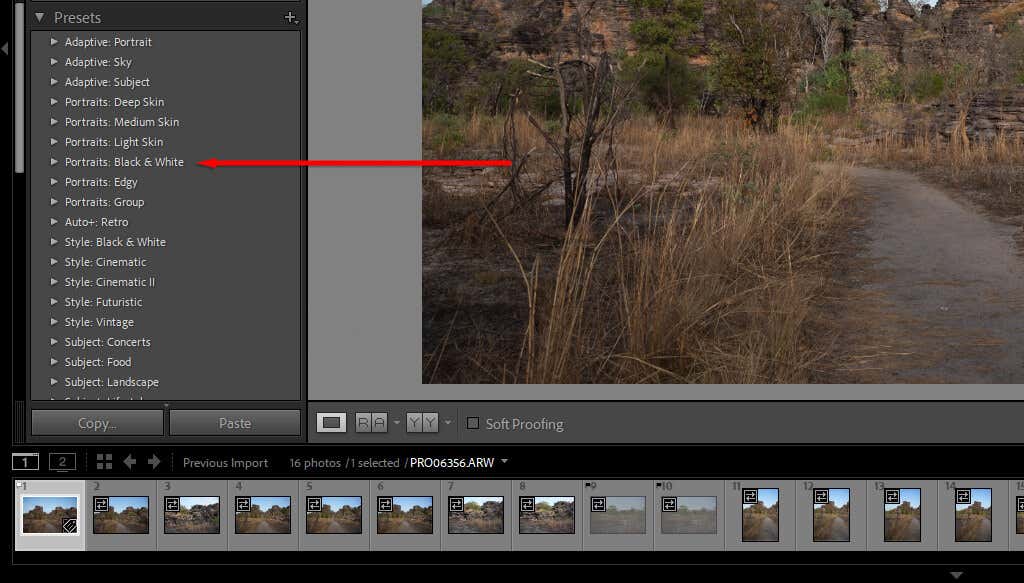
How to Use Lightroom Presets
Presets are the quickest way to edit a photo in Lightroom. Similar to filters in social media apps like Instagram, presets allow you to apply a range of settings to your photo in one hit. Lightroom provides many presets designed for different genres of photography, from vintage effects, to landscape photo enhancements, to black-and-white styles. To preview a preset, hover your cursor over it in the Presets menu. Then, simply select the preset to apply it.
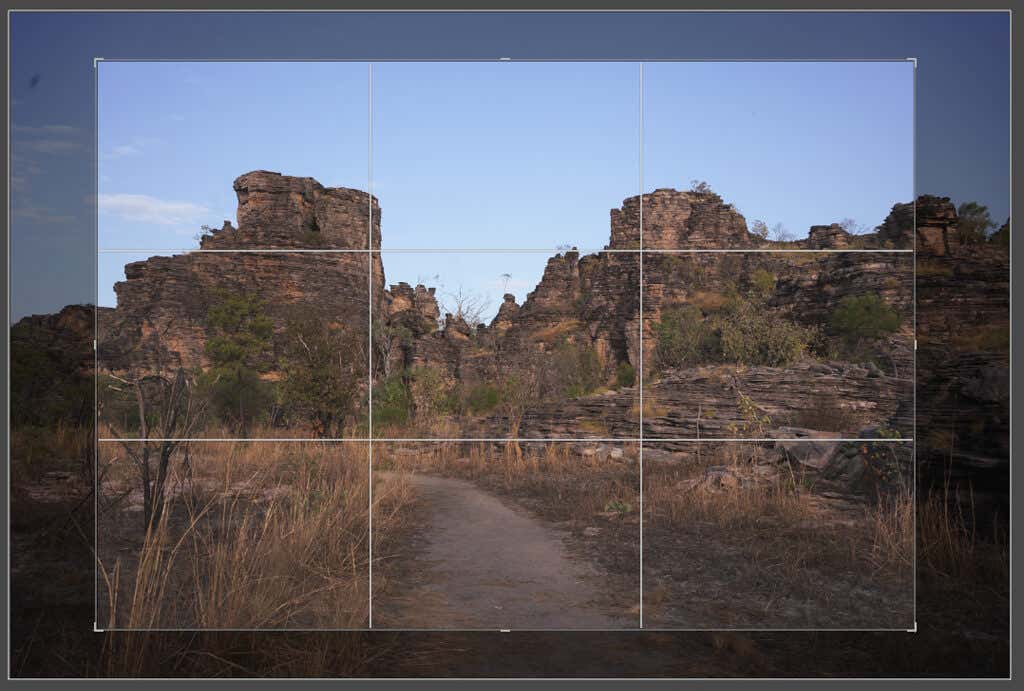
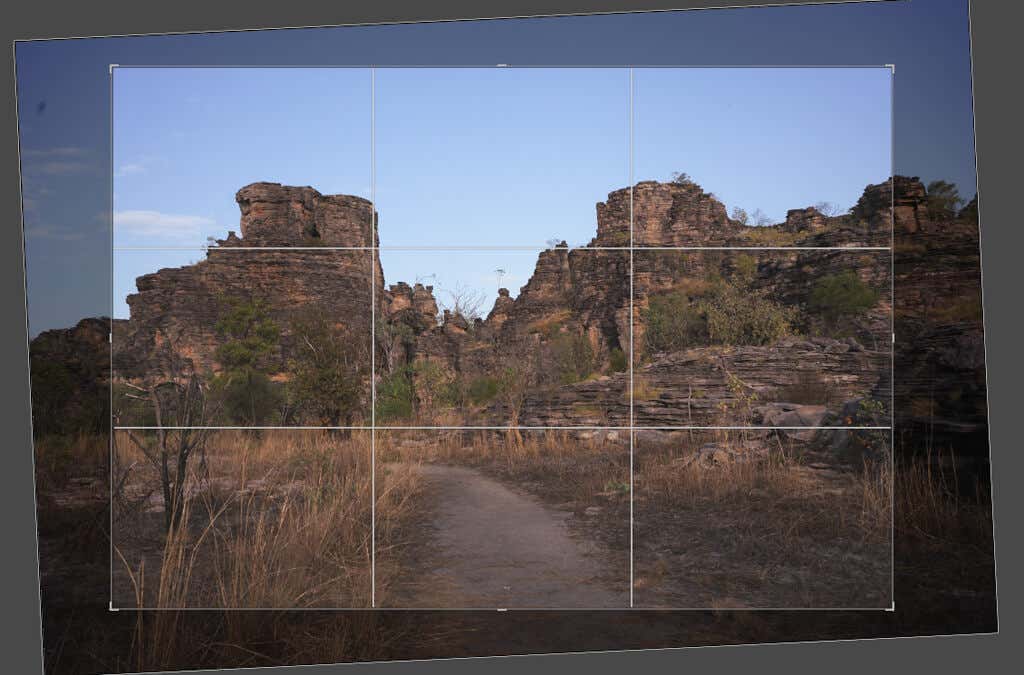
How to Crop and Adjust Perspective
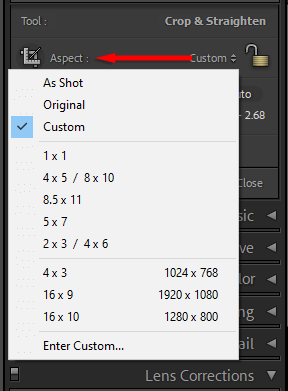
Cropping lets you adjust your image to the best possible composition. When cropping, Lightroom lets you rotate the image to perfect the perspective (for example, you may need to align the image with the horizon). To crop and adjust the perspective in your image, do the following: Pro tip: In the cropping panel, you can choose an aspect ratio. This ensures that your crop overlay conforms to a particular ratio (like 2:3) so that your images remain consistent.
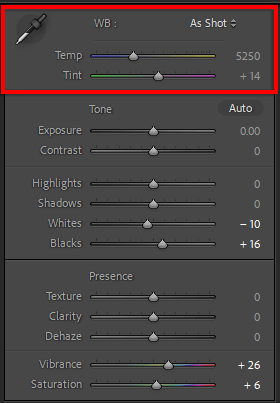
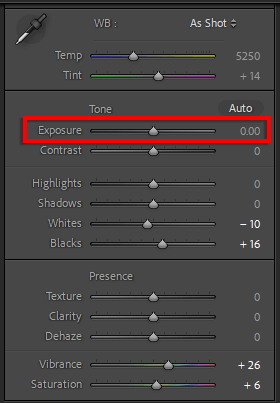
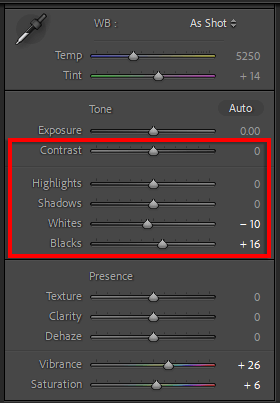
How to Use The Basic Panel
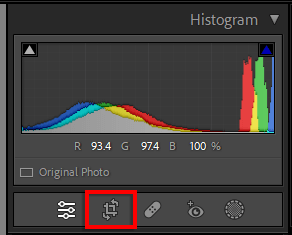
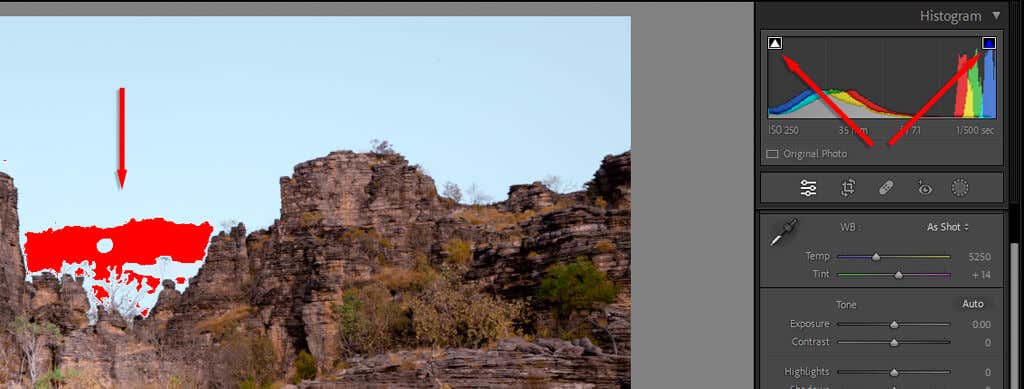
As good as presets are, they don’t always do a great job. Sometimes, a fine touch is required — that’s where the Basic panel comes in. Pro tip: While adjusting the exposure, turn on shadow and highlight clipping by pressing the triangles in each corner of the histogram. With this setting turned on, if you increase or decrease the exposure by too much (called “clipping,” where you lose detail in your image), it will highlight these areas in red.
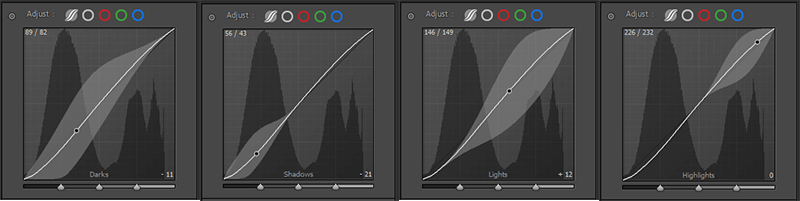
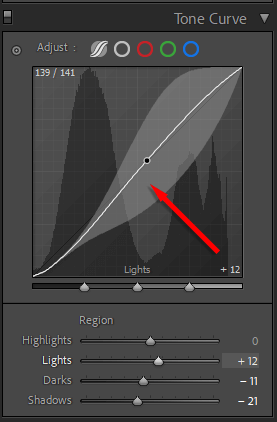
Adjusting Tone Curves
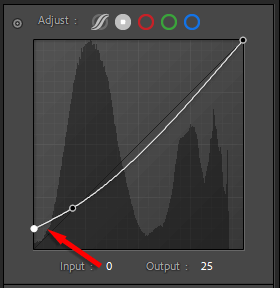
Tone curves are a more advanced way to alter the tone values of your photographs. If you hover over each section of the tone curve, you will see which parts of your images it affects — shadows, darks, lights, or highlights. Selecting and dragging that section of the curve will increase or decrease the value for those tones. While there are many possible variations for your tone curve, the most commonly used conformation is probably the basic S curve. This increases the contrast in your image and leads to a more pleasing look. Pro tip: To add the “faded” look that many modern images have, simply add a point at the lower end of the curve and increase the point where the line meets the left-hand edge, as shown below. This increases the black point so that it’s higher than true black.
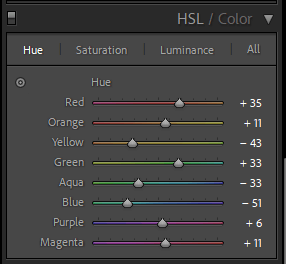
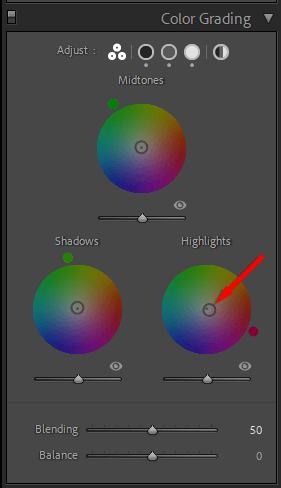
How to Apply Color Edits
To apply color correction, you want to head to the HSL/Color module. Here, you’ll see the list of colors with three columns: Hue, Saturation, and Luminance. Hue affects the actual color. For example, you can change yellow to become much more orange. Saturation affects the intensity of the color. Finally, Luminance alters the brightness of the color. You can also use the Color Grading tab. Here, you’ll have three color wheels that can be used to add particular tints to your mid-tones, highlights, and shadows. Select and drag the center point towards a particular color. The further toward the edge of the wheel you go, the more saturated the color will be. Pro tip: When you apply presets, the HSL and Color Grading tabs are updated with the changed values. This can be a great way to learn color grading in more detail. Simply choose a preset you like, then study sliders. As you experiment with these values, you’ll get an idea of what works and what doesn’t.
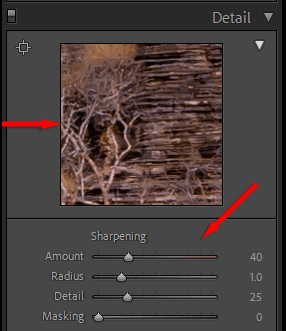
How to Apply Noise Reduction and Sharpening
Next in line is the Detail tab. This section lets you add sharpening and noise reduction to your images if they need it.
The Sharpening Tool features four sliders:
Note: The image shown under “Detail” is a zoomed-in preview showing you what the changes will look like in your image.
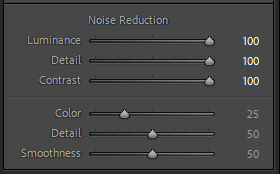
The Noise Reduction tool is very similar. Before we explain the settings, remember that there are two types of noise — luminance and color noise. Luminance is the black-and-white grain you see in noisy images, while color noise is when you get multicolored pixels.
Most of the time, the default values will do fine. Also, Lightroom applies color noise reduction to RAW images on import.
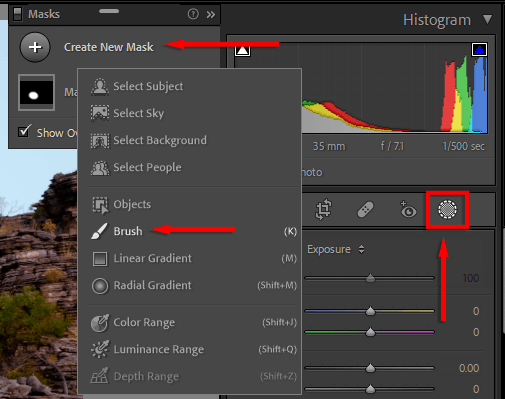
Pro tip: You can use the Adjustment Brush to apply effects to only one area of your image. To do so, choose the Masking icon, then select Create New Mask and select Brush. Select and drag the brush over your photo. The edits you apply in this mode will only affect that area.
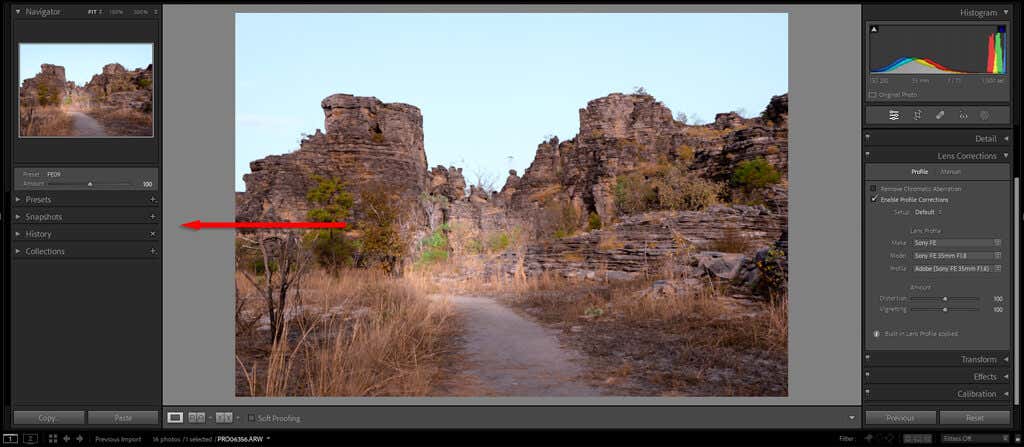
How to Add Lens Corrections
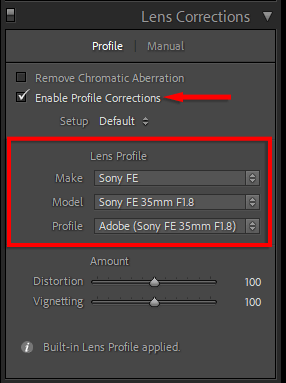
When you take a photo with a digital camera, the file stores information about the lens used. Many lenses are not optically perfect, meaning that straight lines can be distorted and look strange in your photographs. In the Lens Corrections module, click Enable Profile Corrections and ensure that your lens’ make and model is selected in the drop-down menus. Your image will be automatically corrected so that it’s closer to the real thing.
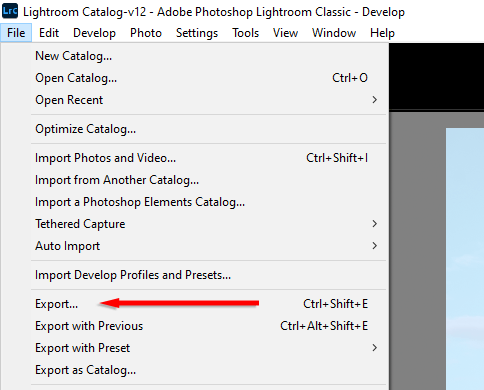
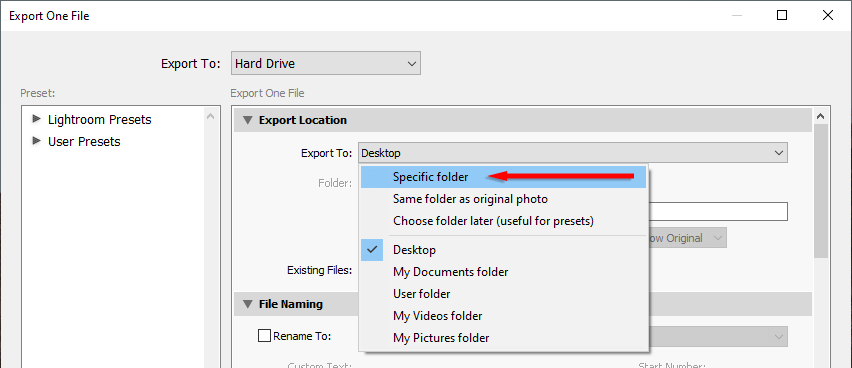
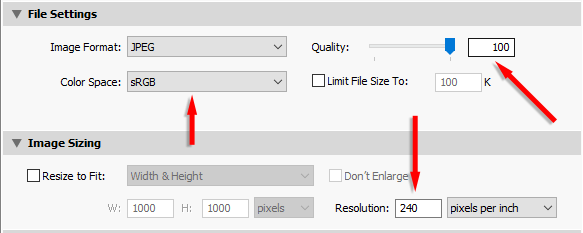
How to Export Images
You’re almost done. The final step is to export your edited photo as a standalone image file. This won’t affect the original file, as it will be saved separately. To export an image:
Start With the Basics in Lightroom
When it comes to digital photography, photo editing software is a must. Lightroom is a powerful program with many features that can help take your basic edits to the next level. To take your edits even further, consider adding Adobe Photoshop to your workflow, too. With this beginner’s guide, you should be well on your way to editing your photos like a professional photographer.